Ultimate Forza Horizon 4 Tuning Guide
Are you struggling to achieve the full potential with your new drift car purchase in Forza Horizon 4? We’ll teach you how to tune your ride to perfection in this guide.
Introduction
So, you’ve watched all the YouTube videos on drifting and purchased your dream drift car in Forza Horizon 4. But, now, when you get behind the wheel to clutch-kick your drifting career into action, it’s nothing like you’d imagined.
Sound familiar?
The default setup on your new purchase is likely to be remarkably similar to real life, which means they’re likely to be great for basic, or perhaps even practical use.
When a car isn’t designed specifically for the track, there are many considerations that manufacturers are required to implement to ensure that it’s also capable on the road.
And we don’t just mean when it comes to navigating the twisties, but also having to deal with everyday driving scenarios, such as speedbumps, gigantic potholes, and the curbs that are lying in wait, ready to rip your bumper off.
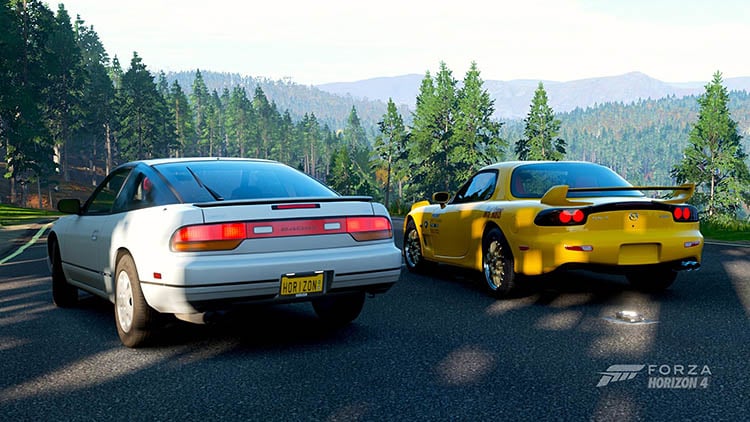
Let’s take the Nissan Silvia S15, for example. It’s a stunning car, and arguably one of the best drift chassis’ on the planet.
Yet, when you purchase the stock car in the Storefront and try to impress your buddies with your drifting skills, they’re unfortunately going to be bitterly disappointed.
The beauty of gaming is that it allows you to install upgrades at the click of a button, and Forza Horizon 4 has one of the most advanced upgrades and tuning platforms out there.
No matter how good you are at Horizon 4, if you’re using a stock setup, then there’s always going to be someone online that’ll be able to do one step better because they’ve refined their tune to perfection.
Although you may sometimes feel like the stock setup works fine with your style of driving initially, it won’t take long before you realize you’re capable of much faster lap times, or drift scores, and its likely to be the tune that’s limiting your potential.
However, we’re not just talking about unlocking the car’s power potential, which you could do with upgrades.
Tuning allows you to refine the vehicle to match your requirements perfectly.
Maybe you’re planning to build a car that’ll flawlessly drift around every corner while maintaining perfect traction, or looking to hit up the drag strip to set a new record time.
Alternatively, perhaps you want to build a rally car to conveniently fly through the mountains to navigate elsewhere on the map as fast as possible, or you want to set a new top-speed record on the highway.
Tuning allows you to adjust every setting imaginable on the car, so once you’ve gained an understanding of how tuning works, you’ll be able to create the ultimate setup, whatever your needs.
With your new-found tuning knowledge, you’ll instantly become quicker or more skillful than ever behind the wheel, which, in turn, will allow you to earn far more money quickly, which will enable you to purchase the best cars and properties in the game.
Are you dreaming of finally being able to call Edinburgh Castle home, with your dream cars lying in wait on the driveway? Don’t panic.
Once you’ve got your tuning nailed, we assure you that the cash will begin flowing in, and you’ll undoubtedly also be able to cause some leaderboard upsets along the way.
And, once Forza Horizon 5 hits the shelves, you’ll already be one step ahead of your rivals, since tuning changes very little between each game; therefore, you’ll be ready to master it right away.
For now, it’s time to look into creating your perfect tuning setup in Forza Horizon 4 to help you prove that you’ve got what it takes to compete with the best.
Getting Started
When it comes to tuning your car, there are a few things to consider. There’s no ‘one size fits all’ method, and your drift tune is likely to be terrible when it comes to rallying, and vice versa.
For that reason, here are a few considerations before we get started with tuning your car.
1) Establish your goals and intentions with your tune
There’s no point going into tuning wanting a ‘good setup’. You’ll need to have a good idea of what you want from your tune right away.
So, now is the perfect time to decide whether it’s going to be a drift weapon, a grippy lap-chaser, a top speed highway cruiser, a quarter-mile drag legend, or a hill-munching rally car.
2) Ironing out the issues
Once you know what kind of setup you’re looking to create, the ideal next step is to try and figure out what you don’t like about the car currently.
For example, is your drift car lacking the power to maintain the drift?
Or, perhaps it lacks steering angle, leaving you spinning out when you try to throw down some ambitious entries?
Gather some ideas of what needs to be improved to correct the major issues right away.
If you’ve got specific issues, don’t be afraid to Google the exact problem at any point during tuning. For example, you could search for ‘car not maintaining drift’ or ‘lack of power in third gear,’ and we can almost guarantee you’ll find a forum post or Reddit thread that will explain what needs to be tweaked.
3) Consider a base tune
Although the in-game Storefront can sometimes provide some great tunes right out of the box, the chances are that you’re going to want to tweak the setup to your personal preferences as you start to improve.
At this point, you’ll realize that a pre-made Storefront tune is, unfortunately, rather useless. Since the setup file is locked, you can’t carry out even the slightest tweaks.
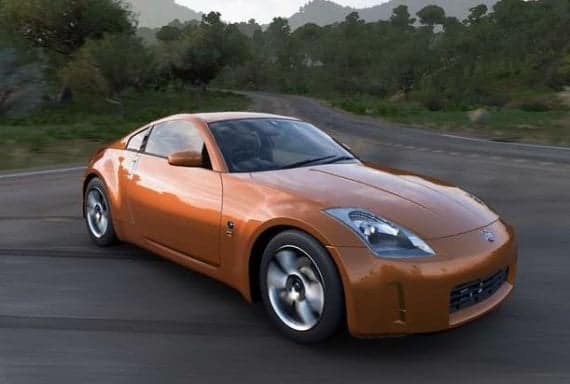
There are plenty of base tunes to be had on various forums and Reddit, so if you search for ‘350z drift tune’ for example, you could carry out the upgrades and tweaks yourself.
We call this a base setup, as it’s created based on someone else’s style of driving, so you’re therefore going to tweak it to suit your own needs.
If you can’t find a base tune online, there are some great apps out there for Apple and Android phones specifically for this task, such as ForzaTune, and QuickTune.
Again, these will provide you with an excellent base setup to get you started, but we’d still recommend refining to achieve the full potential.
4) Turn off the assists
The first step before you start drifting is to ensure you have the optimal in-game settings.
Even with the world’s most incredible drift tune, if you’ve got the wrong settings, then you’re going to struggle even to get your car sideways.
Braking - ABS Off
We prefer to use ABS off for maximum car control.
You can use ABS if you’d rather, but real-world drift cars rarely use ABS, so it’s a great way to refine your braking skills.
ABS off will also allow you to maximize your left-foot-braking potential, which you’re likely to find hugely helpful when you begin doing tandems with friends and other players later on.
Steering - Normal
There’s no real right or wrong here, but it boils down to personal preference, and for us, that’s with ‘normal’ steering.
Although you’ll find yourself rapidly switching left and right to steer, in our opinion, it’s the more comfortable option to get to grips with drifting. However, it’s worth giving both a try to see what suits you best.
Traction Control - Off
Ugh. Traction control. No, just no. Some of you may use it for racing, but for drifting, it’s going to fight against your car when you try to drift.
The last thing you want is a driving assist stopping you from sliding.
Stability Control - Off
Like traction control, this is an absolute no for drifting. We don’t recommend either for complete beginners, as it’s more likely to confuse and frustrate you than it is to assist.
Shifting - Manual, or Manual W/Clutch
For beginners, we would only ever use ‘MANUAL’ transmission as a minimum, and we recommend that you also do so from the start.
Those of you that have some driving, or drifting experience, give ‘MANUAL W/CLUTCH’ a try and see how you go.
You may be thinking it’s a pointless gimmick, but the clutch plays a significant role in refining your drifting ability, and utilizing clutch kicking will improve your skills as you progress.
If you’re new to driving entirely, you can start with Auto if you feel it’s necessary, but we always recommend manual from the start. Auto is just annoying and is likely to leave you in the wrong gear.
Driving Line - Optional
We’ll leave you to decide whether you’ll benefit from this to get you started.
It won’t affect how the game plays; it’ll just give you an idea of the racing line that the game advises.
Remember that this isn’t a drifting line, but if you’re getting started, it may give you an idea of assessing the speed to approach a corner in advance for drifting.
Damage & Tire Wear - Optional
These boil down to personal preferences, and we leave it off, especially for longer sessions, as we feel it’s more for racing than drifting.
Although the tire wear feature can be fascinating to see how they’re heating up, they’ll soon be rendered useless, and the repeated need to pit or exit soon becomes an unnecessary waste of time.
Rewind - Optional
We always leave this on, as it can sometimes help turn back the clock when we mess up on a corner. If only the real world were this simple!
5) Learn the basics of drifting
Head over to our How to Drift guide to ensure you know the drifting basics.
Even with an incredible tune, you’re likely to be disappointed with your lack of talent if you’re new to drifting.
Our guide will break it down, step-by-step to kick-start your dream Forza Horizon 4 drifting career!
Forza Horizon 4 Tuning
It’s time to get started!
Now that you know what you’re planning with your tune, we’ll explain how each element will affect your car.
Although this may seem a little daunting at first, once you’ve grasped the basics, you’ll have a much better understanding of what you want to tweak to either eliminate issues or refine the setup.
It may not come as a huge surprise, but we’ll be mainly focusing on drifting for this guide. We’ll also be discussing how the variables apply to other setups too.
Deciding a Car
Hopefully, by this point, you’ll already have a car in mind that you’re planning to tune.
We always opt for a car with a front-engine, rear-wheel-drive layout, especially if you’re a beginner. You can consider going for mid/rear-engine if you’d prefer, but they’re often far more snappy, which takes much more practice to master.
It’s well worth having a shot at this in the long run, as some of the best drift tunes out there even have rear-engine layouts, but they’ve likely had hours spent refining the setup, combined with a lot of knowledge.
Initial Car Upgrades
Performance/Engine - To keep this simple, we’re opting for all ‘Race’ upgrades for the time being, but don’t be tempted to chase the highest power possible – 400-600 HP will be more than sufficient.
Platform & Handling - We typically go for ‘Race’ everything here, alongside Drift Springs & Dampers.
Drivetrain - Again, ‘Race’ everything.
Wheels & Tires - We prefer Sport for higher power setups and Street for lower power, but don’t go with Slicks/Race tires. Upgrade the rear tires to max-width for optimal grip, but leave the front stock or go up one level if you prefer.
You may wish to upgrade the rim size, but we typically leave it at the stock size unless it looks awful.
Aspiration/Conversion - This falls to your personal preferences, but since installing turbos can provide lag, this can make it more challenging when it comes to drifting, so for beginners, we prefer to go with a high-power naturally-aspirated/stock tune.
Aero/Styling - Go with whatever you think looks best, as it has next to no impact on a drift car.
Tuning
Now that you’ve got the necessary power and handling upgrades to get the car sideways conveniently and maintain the drift, it’s an excellent opportunity to give the car a quick test drive and see how you find it.
At this point, it can be an ideal time to write down some notes on what you feel could be improved so that you know exactly where you want to focus on your tune.
Tires - With tires, the less pressure you put into them, the more grip they’ll provide.
As you’ve probably noticed in the real world, when your tires are flat, they have more contact with the ground.
Although some people might assume you need high tire pressures to lose traction at the rear of a car, this isn’t the case unless you’re in a low-powered car.
With the kind of setups we expect to be working with, the grip is essential for optimal car control. However, too much grip, and you won’t maintain your drift, as you’ll end up excessively gripping to the road surface.
32 PSI, when warm, is typically seen as the optimal tire pressure for grip.
We usually opt for about 25 PSI in the rear with our base setup and 28 PSI upfront.
Depending on your power levels, this should rise to the optimal levels of around 32 PSI once warmed up.
Once you’ve begun burning rubber in your drift car, the heat inside the tires raises the pressure, so we recommend keeping an eye on the telemetry, ensuring that the PSI isn’t raising too high when hot.
If they are, you’re likely to be losing traction, so head back into the tuning menu and lower them accordingly.
Gearing - This can often be one of the more challenging elements of tuning to get right initially, and usually takes some trial and error.
In drifting, the ideal zone is to stay consistently in the rev range’s upper-end without repeatedly bouncing off the limiter, which will cause you to scrub off speed.
Typically, especially on the tight and narrow streets of Horizon 4, we’d expect 3rd and 4th gears to be optimal.
If your car was hitting the redline far too quickly during your test drive, try giving the ‘FINAL DRIVE’ four clicks to the left (or ‘SPEED’ setting.)
Head out for a test drive and see how the gearing feels with the changes. Ideally, you want to consistently maintain the revs around 1,000 RPM before it hits the red line, using throttle control.
If you get lucky, just changing the final gear might resolve your issue. If not, you’ll need to tweak the individual gears to your needs.
Don’t make any drastic changes, as fine-tuning is vital here. Otherwise, you’ll likely need to reset it after.
If you’re finding that a specific gear is getting bogged down mid-drift and stops providing power to the rear wheels, give that gear a couple of clicks to the right (‘ACCELERATION’) to kick it up a notch.
Perhaps you’re hitting the limiter too quickly? If so, move it left, towards ‘SPEED’.
Gearing is a trial-and-error game that will require patience, and something that will take some getting used to.
However, once you nail it, it’s super satisfying to help you achieve the perfect drift.
If you’re still not getting the hang of gearing, this guide will provide everything you need to know:
Alignment
Ensuring that you opted for the ‘Drift’ suspension setup will be vital here, so it may be worth double-checking you’ve installed that.
Camber - We always want to keep the camber negative at the front on a drift setup, and we would never expect to have to use positive camber on the front or the rear.
Adding negative camber pulls the top of the wheel into the arch, and this is what provides the ‘stance’ look, where the wheels aren’t sitting flat.
With positive camber, the upper part of the wheel would be pointing away from the car, which looks awful. Don’t do this, ever. Please.
In drifting, this allows for increased grip when you’re on full lock on the front wheels, so negative camber is beneficial to keep your car heading in the intended direction, and also for grip upon transition.
Camber is another fine-tuning process to get right, but lets set the fronts to -5 degrees and the rear to -2 before heading out for a test drive.
In reply mode, toggle the telemetry and check out the camber as your car is drifting.
Ideally, you want to be at around 0 degrees, without the camber heading into the positive zones.
It can be handy to write down the numbers here and add a little negative or positive camber until you feel satisfied that you’re getting as close to 0 degrees as possible all-around.
Toe - Higher ‘Toe Out’ on the front is favorable for drifting, as it gives you a more effective steering angle, but will make the car more challenging to drive when you’re not sideways, and will also make you drift slower due to the amount of angle you’re sustaining.
We recommend trying around 2 or 3 degrees of ‘Toe Out’ on the front, and tweaking if you feel the car has way too much angle.
In the rear, it’s a different story, as the wheels aren’t turning.
More toe out in the rear will help extend the drift and keep the back-end sliding, which can help achieve high-score drifting events, where you can try using around 1.5 degrees.
We typically keep it between 0-0.5 degrees for tandem runs, where precision is more vital.
Now that you understand how toe works have a play about to find what suits your style/needs best.
Caster - Front caster will adjust your suspension shock tower backward and forwards.
The higher the caster, the higher your car’s stability; however, if you opt for less caster, you’ll get a highly-responsive, snappy setup.
Caster settings all depend on what you’re aiming to achieve.
To get started, we advise keeping it at 7 degrees, since this is the most stable and predictable setting. From there, you can tweak it until it feels too extreme.
Antiroll Bars - We typically go quite soft with the front ARB, and then work our way up until we find the perfect zone.
On the rear, the softer the setting, the higher the grip, so we again go for a low base and then build up gradually if you’re finding that there’s too much grip.
Springs - This is most useful when your speed or direction is changing during drifting and transitioning. If your springs are too soft, they can ‘bottom out,’ which defeats the point of them. When your springs are bottoming out, it’ll cost you both speed and stability.
On the other hand, if the springs are too stiff, they’ll not allow for optimal weight transfer when transitioning, which will likely lead to you losing the drift and straightening.
If you lack in front grip, try softening the front suspension for a quick tweak, which can often resolve the issue.
Ride Height - We believe that drift cars should always be slammed (sorry, Formula Drift), and we typically opt for the lowest setting.
However, we accept that this isn’t always optimal for grip, so you can consider raising the suspension and going a little softer on the springs if necessary.
Some tuners prefer to run higher ride height at the front than the rear to compensate for the engine weight under braking. You may have also noticed this on the Formula Drift cars.
Damping
Rebound Stiffness - This is how your car deals with sudden bumps in the road, which certainly isn’t uncommon on the UK streets in Forza Horizon 4.
With higher settings, you can absorb the random bumps in the road more manageable, and an excellent place to start is by replicating the Springs and Rollbar sliders for an initial base tune.
Bump Stiffness - For your base set up, initially go for between 50-70% of your Rebound Stiffness, and adjust accordingly.
If you’re keen to know more about in-depth tuning, we highly recommend checking out this fantastic guide when it comes to perfectly refining the settings:
Aero - We don’t ever alter the aero for drifting, as you’re not likely to reach speeds that will enable you to benefit from doing so.
Although most kits won’t allow for aero tuning, if the option is available, then if you’re after front turn-in, opt for more downforce in the front, for more grip, add more downforce in the rear.
Brake
Braking Force - This is based on personal preference and will decide whether you want the optimal braking force to be at the front or the rear under braking.
Most drifters prefer front braking force, as it allows you to throw your car into the corner.
We recommend trying different settings, starting at 100% front, and working your way up to about 40% until you find what works best for you.
Brake Pressure - With ABS off, higher brake pressure will allow for more aggressive entries and transitions, so we recommend trying between 100-120% to see what suits your driving style.
Differential - We always opt for 90-100% acceleration, enabling oversteer by locking the wheels together conveniently and consistently. We wouldn’t recommend going lower than 80%.
With deceleration, too low of a setting can promote excessive weight-shift and make it unpredictable when braking as it locks up slowly, which is likely to cause you to spin out or have your car shoot off to one side unpredictably.
A higher configuration maintains the consistent rear-wheel lockup even off-throttle.
We like to start with both on 100%, but gradually lower deceleration to around 80-90% if you find that the spinning out or struggling to come out of corners appears to be power related.
If you’re struggling to nail differential tuning, make sure you watch this in-depth guide which will teach you everything you could possibly need to know:
Conclusion
So, there we have it! We hope that we’ve covered everything you could want to know about Forza Horizon 4 Tuning in this guide.
We’ve combined our knowledge from spending way too many hours on FH4, alongside some of our favorite YouTube guides that we’ve tried and tested with fantastic results to bring you this Ultimate Forza Horizon 4 Tuning Guide.
If we’ve missed anything you’d like to know, feel free to drop us a line, and we’ll more than happily update the guide further down the line.
Thank you for reading our Forza Horizon 4 Tuning Guide.
If you enjoyed this article, then please share it with the buttons at the side and bottom of your screen. If you’ve found this information useful, then please take a moment to share it with other Forza, drift, or racing game enthusiasts. We appreciate your support.
Find out how you can earn crazy amounts of credits with our Forza Horizon 4 money glitch guide.
Photography credits
We thank the following entities for the use of their photography in this article:


